![]()
Cover DesignCreating a cover for your book that is set up correctly can be an easy process so long as a few simple guidelines are followed. This guide is designed to give you the information you need to successfully create a cover for your book that satifies the requirements for digital print production. This guide is primarily aimed at users creating their own artwork with PhotoShop or other image editing applications, The information given can also be adapted and applied to other design software like QuarkXPress, InDesign, Illustrator, Freehand and CorelDraw. Office applications like Word and Publisher can be used but are not recommended. Before You BeginBefore starting your artwork for your book cover you will need to know some basic physical details of your book. By this point it is assumed that you have completed the text of the book and it is in a form ready for printing. Having got this far you will know need to know:
The final page size of the book is usually decided upon by a mixture of individual taste and the purpose of the book, There are several common page sizes that exist in the industry including:
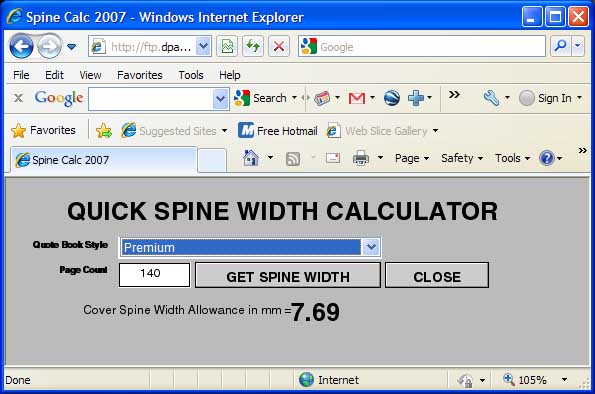
The total number of pages is determined by the text, including all preliminary and index pages and blanks. You can use our spine width calculator here to define the spine width of the book by entering the page count and one of these chosen book styles:
If your page count is an odd number, round it up to the nearest even number (eg. 173 pages must be round up to 174 pages). Click the Get Spine Width button once you've entered the page count and chosen the book style to display the spine width that will need to be incorporated into the cover artwork. Example 1.We have a book of 140 pages and we've chosen Premium as our book style. Using the spine width calculator we get a spine width of 7.69mm.
It's important to note that this measurement is applicable to that individual book and should be recalculated for any other book. If the total page count changes by more than six pages this figure will need to be recalculated. Preparing the Artwork FileYou should how have enough information about the dimensions of the book to start building your cover. Below is a diagram for the basic layout for a cover. You will notice that there are two coloured areas depicted. The light pink represents the final trimmed area. The dark pink represents the bleed area. Bleed is very important - it is an extension of the cover artwork to prevent white unprinted areas around the edges appearing on the final trimmed book. There will be a more thorough explanation of bleed later in this guide, but for now it's enough to know that we require 5mm bleed on each edge.
You are now ready to create a blank document for your cover. You will need to create a new document in your chosen design application that measures:
If you are using PhotoShop or similar, then you must also specify that the image resolution is 300 dpi and that the colour mode is CMYK. Other colour modes may result in colour shifts when printed and are not recommended. Once you have your blank document it is highly recommended that you place guides down for the 5mm bleed margin and also for the spine area. This should give you two large areas equal to the page size of the book, separated by the spine area (as determined by the calculator earlier) and all three will be surrounded by the 5mm bleed area. You may now start constructing the design for the front cover, spine and back cover using the areas defined by the guides in your document. At this point it is very important to be aware of the bleed area. Bleed as described earlier is necessary so that any slight imperfections in the printing, binding and trimming of the book do not result in unsightly white lines on the edges of the final trimmed book. Be aware that anything placed within this area will not appear on the trimmed book. Any backgrounds or images that touch the inside of the bleed margin (which represents the trim line) will need to be extended right to the edge of the document. There should be no obvious transition between the bleed area and the adjoining cover area. See below for some visual examples. Any part of the cover extending into this bleed area will be trimmed away, so it is vital that any design elements that must not be trimmed off be kept well inside (ie. at least 4mm) the inner bleed margin or trim line. This includes text, logos or important graphics that shouldn't be trimmed through. Example 2
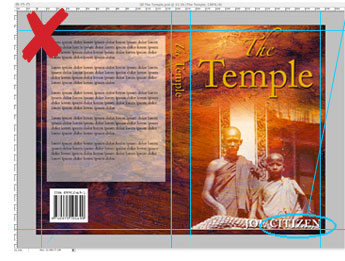
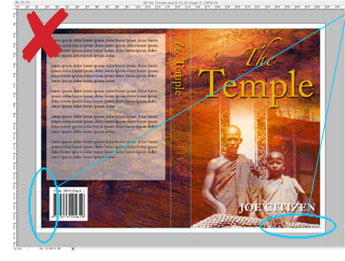
INCORRECT: Here the bottom and right edges of the front cover picture stop at the trim line (as represented by the blue guides). It should be extended into the bleed area all the way to the edge of the document. Also the text of the author's name has been placed right up against the trim line. This is in danger of being trimmed through and should be moved at least 4mm way from the trim line. Example 3
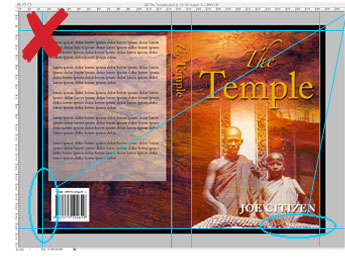
INCORRECT: Here all the edges of the background have stopped at the trim line. There is no bleed at all, even though the area has been allowed for. The bleed must be a seamless transition from the cover. If we were to receive artwork like this, all we can do is enlarge the cover so that we can create some bleed from the artwork inside the trim line. This is likely to cause a lot of problems - objects close to the trimline (like the text box on the back cover) might be trimmed through, the spine might become too thick to fit the allowed area, and the front and back covers might appear lopsided. Example 4
INCORRECT: Similar to Example 3, all the background elements have stopped at the trim line, but here the bleed area has been filled with black. This is the same as no bleed at all and poses an identical problem to Example 3, resulting in the same types of issues. Example 5
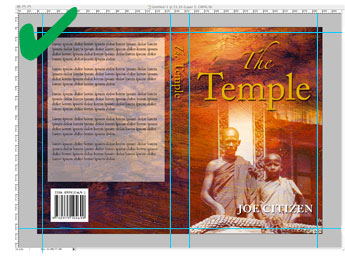
CORRECT: This layout satifies all the bleed requirements. The background and front cover picture extend through the bleed area to the edge of the document. There are no text or graphic elements dangerously close to the trim guides and the spine is correctly sized and placed. Cover Artwork File Formats
It's always a good idea to include either a printed copy or a visually checked PDF file with your cover artwork as this gives us an idea what the cover should look like. |